In the realm of modern photography, few genres are as evocative and emotionally charged as the “dark city” aesthetic. This style, often rooted in noir themes and urban exploration, reveals the gritty, mysterious, and shadowed side of city life. Through meticulous lighting, composition, and post-processing, photographers can craft scenes that speak volumes — not only about the environment but also about society, isolation, and the human condition.
Mastering the dark city techniques involves more than simply wandering into an alley and pointing a camera. It requires a deep understanding of lighting, narrative concept, color grading, and mood control. In this article, we’ll explore the core principles behind this captivating style and provide a structured approach to developing your own photo project based on dark city aesthetics.
Understanding the Dark City Aesthetic
At its core, the dark city style captures the nocturnal soul of urban life. Think neon reflections bouncing off wet pavement, empty streets cloaked in shadows, or a lone individual standing beneath a flickering sign. Mood, contrast, and storytelling become paramount.
Several key characteristics define the look:
- Low-key lighting – High contrast between light and dark, often with isolated points of brightness.
- Urban isolation – Solitary subjects, vast empty streets, or figures lost in their environment.
- Moody atmosphere – Fog, rain, and night all contribute to an enigmatic ambiance.
- Color grading – Dominant tones like cyan, amber, and deep purples to control emotional response.
- Narrative-driven composition – Pictures that suggest a story or emotional undercurrent, even without characters.
These components come together to create the sense of a living, breathing organism, teeming with unspoken secrets and unsolved paradoxes. The aim is not just to document a place, but to magnify its essence.
Planning a Dark City Photo Project
Every successful project begins with intention. Defining what you want to portray is crucial in this type of work. Consider themes such as urban decay, anonymity in modern society, or even the juxtaposition of desolation and density.
Key considerations before you begin:
- Location scouting – Identify atmospheric neighborhoods, alleys, empty train stations, overpasses, or construction sites that lend themselves to mysterious visuals.
- Time of shooting – Nighttime is usually ideal, enhanced by rain, fog, or other ambient weather that contributes reflections and atmosphere.
- Storyboarding – Sketch or outline the types of scenes you envision. Will there be people? What kind of mood do you want to elicit?
- Equipment readiness – Low-light capable gear, fast lenses (f/1.4 to f/2.8), a sturdy tripod, and noise-reducing post-processing software are highly recommended.
Capturing the dark city is more than technical prowess — it’s about architectural intuition and emotional sensitivity. You should recognize how structures and light interact, and how emotion can be embedded into geometry and negative space.
Essential Techniques in the Field
Once you’re in position to start shooting, here are some on-location techniques that are particularly well suited to the dark city aesthetic:
1. Mastering Light and Shadow
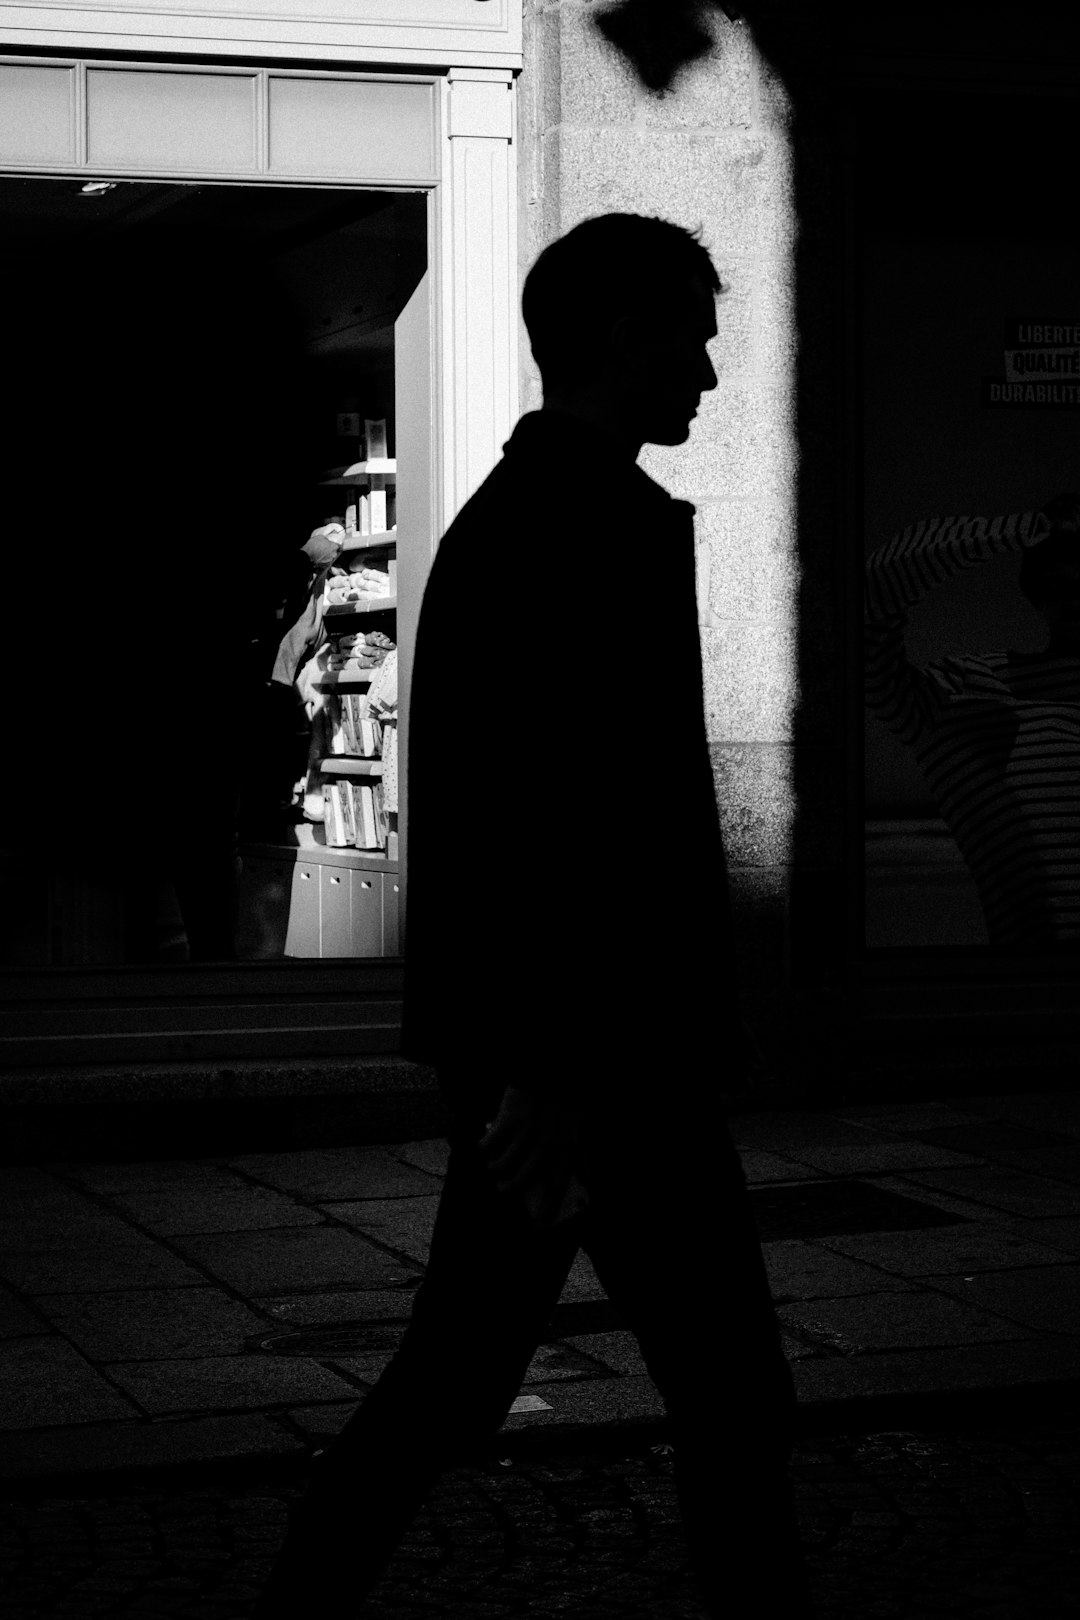
Use available light sources strategically: neon signs, street lights, windows, or lit advertisements can illuminate your subject while allowing the surrounding darkness to frame them. Avoid using flash, unless you’re deliberately trying to create a jarring, surreal effect.
Try capturing silhouettes by shooting against brighter background light, and use shadows to create tension and ambiguity. The idea is often to suggest rather than reveal.
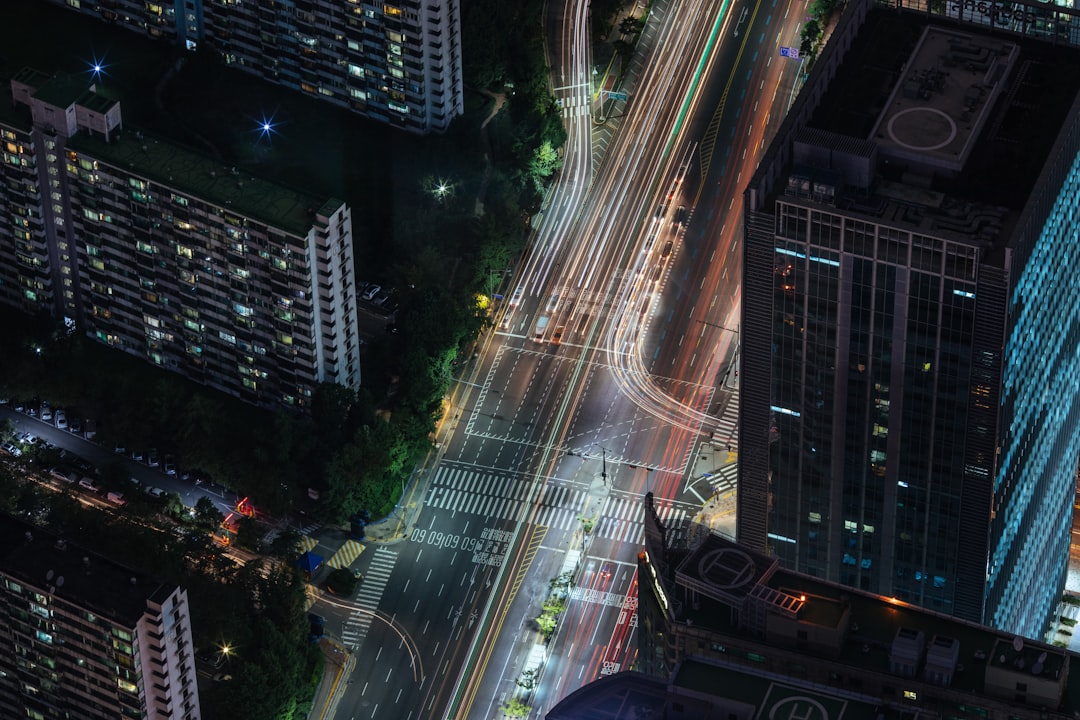
2. Long Exposure and Motion
Long exposures introduce an element of movement amidst stillness. A blurred pedestrian crossing an empty street or streaks of car tail lights paint dynamic contrasts that evoke curiosity and drama in your images.
A tripod is essential for these kinds of shots. Experiment with shutter speeds from 1 to 10 seconds, adjusting ISO and aperture accordingly to keep the exposure balanced.
3. Color and Contrast Control
Dark city photography relies heavily on post-processing. Desaturate selectively or push teal/orange contrasts to evoke cinematic undertones. Pay close attention to the highlights — they should punctuate the scene rather than overexpose it.
Black and white processing can also be incredibly effective, removing distractions and pushing focus toward shape, form, and texture. Deep blacks paired with luminous whites imbue photographs with dramatic gravitas.
Common Mistakes and How to Avoid Them
Photographing dark settings comes with its own set of challenges. Here’s how to avoid the most frequent pitfalls:
- Excess noise – High ISO levels can deteriorate image quality. Mitigate this using a tripod and longer exposures instead of cranking ISO up too far.
- Blown highlights – Urban lighting can be harsh. Always check your histogram and expose for the highlights; you can recover details in shadows more easily.
- Lack of message – Don’t mistake atmosphere for meaning. Each shot should serve your project’s core theme or narrative.
- Over-editing – While stylistic editing is part of the genre, overuse of clarity sliders, vignettes, or artificial effects can risk damaging the authenticity of the work.
Tips for Working with Models or Subjects
If your vision includes human figures, collaboration with your subject becomes crucial. The individual in the photograph must appear as part of the city’s fabric, not apart from it.
Suggestions for incorporating people include:
- Having them face away from the camera to suggest anonymity.
- Using their shadow instead of direct depiction to add drama.
- Silhouetting the subject in front of intense backlight to create mystery.
Don’t forget to experiment with wardrobe and props – a trench coat, an umbrella, or basic streetwear can all steer the image in a specific direction.
Building a Cohesive Photo Series
After collecting a variety of photographs, the next step is to curate your final series. A successful photo project isn’t just a folder of good images—it’s a visual essay.
Steps to consider:
- Sequence intentionally – Start with a strong hook image, build momentum, create a narrative arc, and end with emotional resolution or enigma.
- Limit your selection – More is not better. Choose only the images that convey the atmosphere and message unmistakably.
- Unify styling – Tone matching across the series will make your project feel more cohesive. All images should look like they belong to the same visual universe.
When formatted for exhibitions or portfolios, carefully consider how the images interact next to one another. Contrasts or transitions in mood can open deeper dialogues with the viewer.
Conclusion
The dark city technique represents more than an aesthetic—it’s a medium for urban storytelling. It challenges the photographer to morph gritty realism into poetic abstraction. It encourages a deeper inspection of cities at their most silent and evocative moments.
As you embark on your own project, remember that patience and vision are your greatest tools. Let your city whisper to you. And in the whispered shadows, build your timeless, cinematic world.